Have you ever run out of space on your C drive, or simply prefer to keep your files organized in a different location? Changing the default user folders in Windows can help you reclaim valuable disk space and streamline your file management. Whether you want to move your Documents, Pictures, Music, or Downloads to a secondary drive, the process is simpler than you might think. In this blog post, I’ll walk you through the steps to relocate your user folders, ensuring that your files are accessible and your system runs smoothly. Let’s get started on customizing your Windows experience!
Method 1
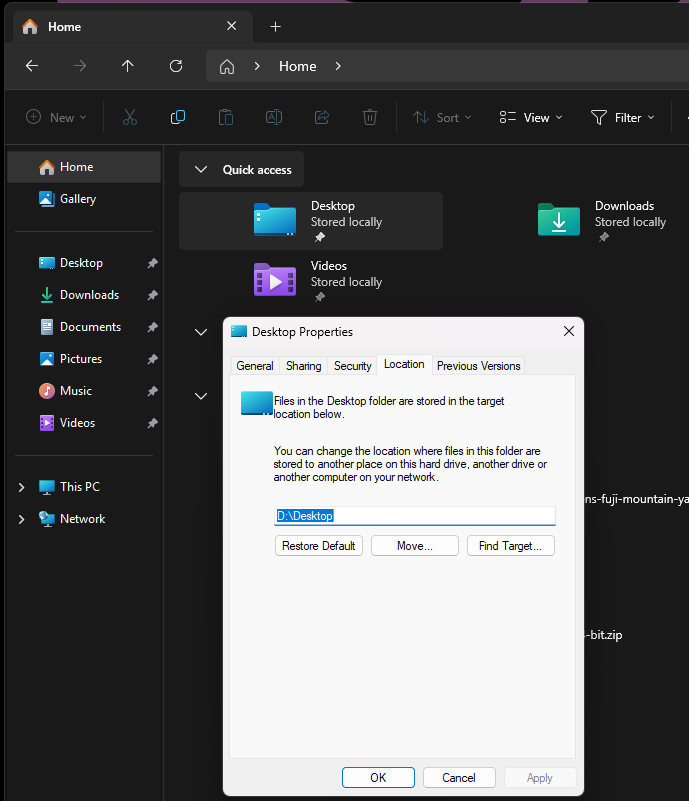
Open up a new explorer windows, right click on the folder you wish to re-locate, select the Location tab and enter your desired path, windows will ask you if you want to copy existing files and create the folder if it does not exist.

Method 2
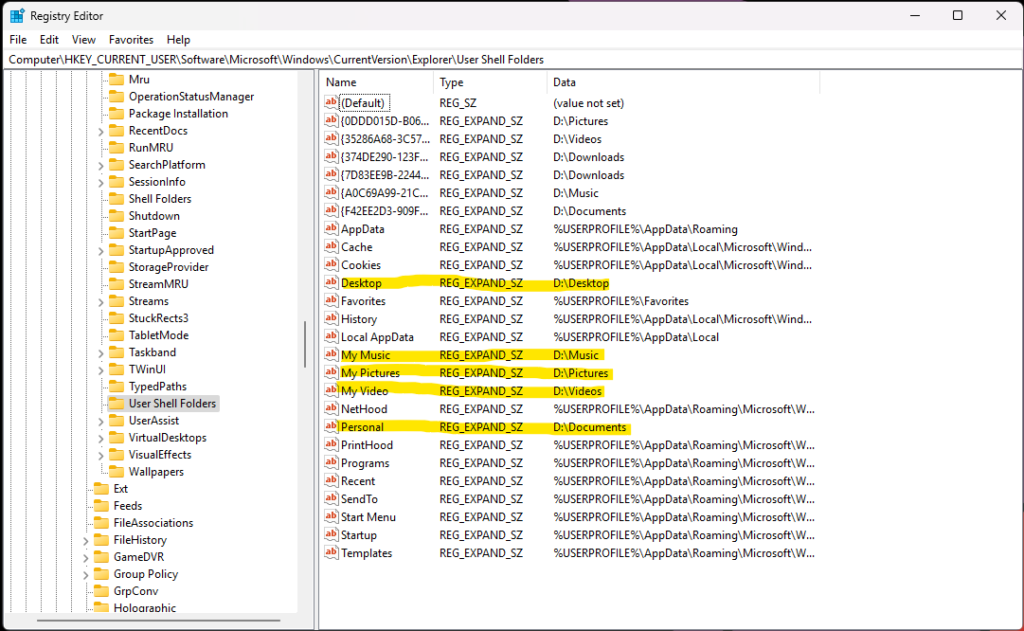
There are times when windows will throw an error when trying to change the location this way, especially if you are trying to get rid of OneDrive, to get around this we can use RegEdit instead. Press start, type Registry and click on Registry Editor when it shows up, once there go to the following path:
“Computer\HKEY_CURRENT_USER\Software\Microsoft\Windows\CurrentVersion\Explorer\User Shell Folders”
I have highlighted the values you should change:

Once you have completed your change, save and reboot the system. That’s it, Done!
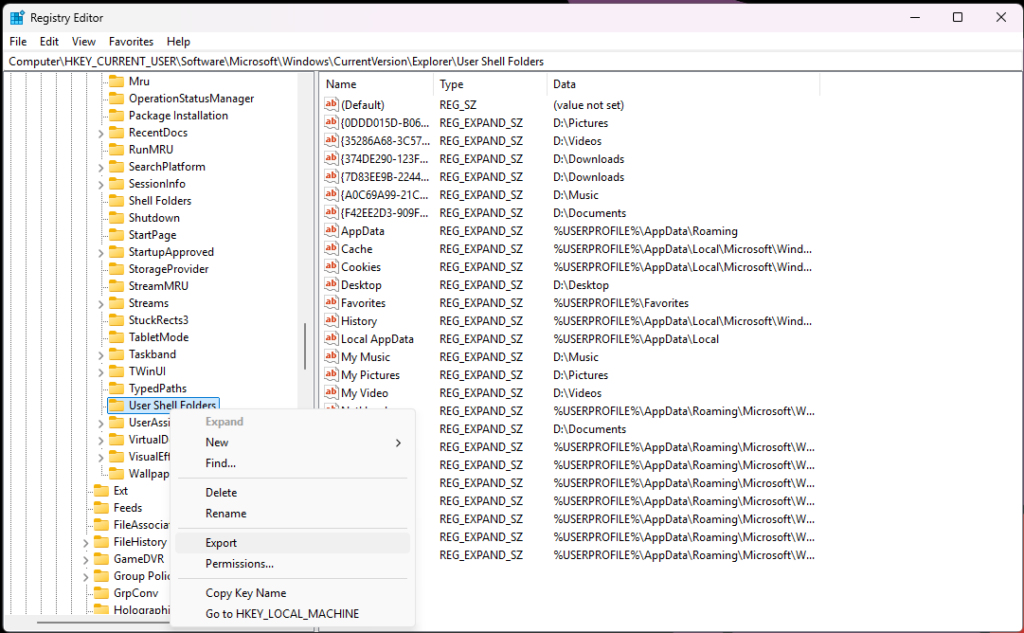
If your files are located on another drive, you can simply export this Registry and run it every time you install a fresh version of windows, to do so simply right click on User Shell Folders and select Export:

Call the file whatever you like and enjy 🙂
